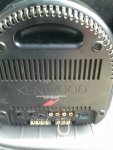
සබ් වූෆර් එකක් හදමු (Lets make a sub woofer)
අද මම ඔයාලට කියලා දෙන්නම් සබ් වූෆර් එකක් හදන්නේ කොහොමද කියලා. පලමුව අවශ්ය උපකරන සහ අමුද්රව්ය මොනවද කියලා බලමු.
*අගල් 12/10/8 ස්පීකර් එකක්
*අගල් 1/2
* අවශ්ය ප්රමාණයට ඇණ
*ඇලවීමට ස්ටිකර් හෝ වෙල්වට්
*බෆල් වයර් ක්ලිප් ගහන බේස් එක(ඒකේ නම දන්නෙ නෑ)
*කියතක්
*ජික්සෝ එකක්
හරි දැන් වැඩේ පටාන් ගමු.
හරි මෙන්න බෝර්ඩ් එක කපා ගන්න ඕන ප්රමානයන්.


පියවර 02

 කැමති නම් බේස් හෝල් එකක් තියා ගන්න.
පියවර 03

පියවර 04

පියවර 05

පියවර 06

පියවර 07

පියවර 08

පියවර 09

පියවර 10

පියවර 11

පියවර 12


ඔන්න සබ් වූෆර් බේස් සර්කිට් එකක් උවමනා කරන අයට.

22 Watt Car Subwoofer Amplifier
22W into 4 Ohm power amplifier, Variable Low Pass Frequency: 70 - 150Hz
This unit is intended to be connected to an existing car stereo amplifier, adding the often required extra "punch" to the music by driving a subwoofer. As very low frequencies are omnidirectional, a single amplifier is necessary to drive this dedicated loudspeaker. The power amplifier used is a good and cheap BTL (Bridge Tied Load) 13 pin IC made by Philips (now NXP Semiconductors) requiring a very low parts count and capable of delivering about 22W into a 4 Ohm load at the standard car battery voltage of 14.4V.
Circuit diagram:Parts:
P1_____________10K Log Potentiometer
P2_____________22K Dual gang Linear Potentiometer
R1,R4___________1K 1/4W Resistors
R2,R3,R5,R6____10K 1/4W Resistors
R7,R8_________100K 1/4W Resistors
R9,R10,R13_____47K 1/4W Resistors
R11,R12________15K 1/4W Resistors
R14,R15,R17____47K 1/4W Resistors
R16_____________6K8 1/4W Resistor
R18_____________1K5 1/4W Resistor
C1,C2,C3,C6_____4µ7 25V Electrolytic Capacitors
C4,C5__________68nF 63V Polyester Capacitors
C7_____________33nF 63V Polyester Capacitor
C8,C9_________220µF 25V Electrolytic Capacitors
C10___________470nF 63V Polyester Capacitor
C11___________100nF 63V Polyester Capacitor
C12__________2200µF 25V Electrolytic Capacitor
D1______________LED any color and type
Q1,Q2_________BC547 45V 100mA NPN Transistors
IC1___________TL072 Dual BIFET Op-Amp
IC2_________TDA1516BQ 24W BTL Car Radio Power Amplifier IC
SW1____________DPDT toggle or slide Switch
SW2____________SPST toggle or slide Switch capable of withstanding a current of at least 3A
J1,J2__________RCA audio input sockets
SPKR___________4 Ohm Woofer or two 8 Ohm Woofers wired in parallel
හරි දැන් වැඩේ ඉවරයි. කැමති අයට පුලුවන් මෙකෙ ඇතුලටම සබ් වූෆර් සර්කිට් එකක් දාලම හදා ගන්න. සබ් වූෆර් සර්කිට් ඉලෙක්ට්රොනික් බඩු තියන කඩ වල තියනවා. රුපියල් 500-1000 අතර වෙයි.
මේක මම හදපු ත්රෙඩ් එකක්.කොහෙන්වත් කොපි කරේ නැ. ඒත් පොටෝ නම් උස්සපු එවා. ඔන්න මම් වැඩේ කරන හැටි කියලා දුන්න. ඉතිරි වැඩ ටික ඔයලා අතේ තමයි ඉතින්.
අනිත් අයටත් බල්ලන්න බම්ප් එකක්වත් දාලා යන්න.
ජය වේවා....
අද මම ඔයාලට කියලා දෙන්නම් සබ් වූෆර් එකක් හදන්නේ කොහොමද කියලා. පලමුව අවශ්ය උපකරන සහ අමුද්රව්ය මොනවද කියලා බලමු.
*අගල් 12/10/8 ස්පීකර් එකක්
*අගල් 1/2
* අවශ්ය ප්රමාණයට ඇණ
*ඇලවීමට ස්ටිකර් හෝ වෙල්වට්
*බෆල් වයර් ක්ලිප් ගහන බේස් එක(ඒකේ නම දන්නෙ නෑ)
*කියතක්
*ජික්සෝ එකක්
හරි දැන් වැඩේ පටාන් ගමු.
හරි මෙන්න බෝර්ඩ් එක කපා ගන්න ඕන ප්රමානයන්.
- Rectangular box:
Height: 13"
Width: 14"
Depth: 12" - Wedge box:
Height: 14"
Width: 18"
Depth 1: 5"
Depth 2: 8"

- Rectangular box:
Height: 11.5"
Width: 12.5"
Depth: 10.5" - Wedge box:
Height: 12.5"
Width: 16.5"
Depth 1: 3.5"
Depth 2: 6.5" -


පියවර 02

පියවර 03

පියවර 04

පියවර 05

පියවර 06

පියවර 07

පියවර 08

පියවර 09

පියවර 10

පියවර 11

පියවර 12

ඔන්න සබ් වූෆර් බේස් සර්කිට් එකක් උවමනා කරන අයට.

22 Watt Car Subwoofer Amplifier
22W into 4 Ohm power amplifier, Variable Low Pass Frequency: 70 - 150Hz
This unit is intended to be connected to an existing car stereo amplifier, adding the often required extra "punch" to the music by driving a subwoofer. As very low frequencies are omnidirectional, a single amplifier is necessary to drive this dedicated loudspeaker. The power amplifier used is a good and cheap BTL (Bridge Tied Load) 13 pin IC made by Philips (now NXP Semiconductors) requiring a very low parts count and capable of delivering about 22W into a 4 Ohm load at the standard car battery voltage of 14.4V.
Circuit diagram:Parts:
P1_____________10K Log Potentiometer
P2_____________22K Dual gang Linear Potentiometer
R1,R4___________1K 1/4W Resistors
R2,R3,R5,R6____10K 1/4W Resistors
R7,R8_________100K 1/4W Resistors
R9,R10,R13_____47K 1/4W Resistors
R11,R12________15K 1/4W Resistors
R14,R15,R17____47K 1/4W Resistors
R16_____________6K8 1/4W Resistor
R18_____________1K5 1/4W Resistor
C1,C2,C3,C6_____4µ7 25V Electrolytic Capacitors
C4,C5__________68nF 63V Polyester Capacitors
C7_____________33nF 63V Polyester Capacitor
C8,C9_________220µF 25V Electrolytic Capacitors
C10___________470nF 63V Polyester Capacitor
C11___________100nF 63V Polyester Capacitor
C12__________2200µF 25V Electrolytic Capacitor
D1______________LED any color and type
Q1,Q2_________BC547 45V 100mA NPN Transistors
IC1___________TL072 Dual BIFET Op-Amp
IC2_________TDA1516BQ 24W BTL Car Radio Power Amplifier IC
SW1____________DPDT toggle or slide Switch
SW2____________SPST toggle or slide Switch capable of withstanding a current of at least 3A
J1,J2__________RCA audio input sockets
SPKR___________4 Ohm Woofer or two 8 Ohm Woofers wired in parallel
හරි දැන් වැඩේ ඉවරයි. කැමති අයට පුලුවන් මෙකෙ ඇතුලටම සබ් වූෆර් සර්කිට් එකක් දාලම හදා ගන්න. සබ් වූෆර් සර්කිට් ඉලෙක්ට්රොනික් බඩු තියන කඩ වල තියනවා. රුපියල් 500-1000 අතර වෙයි.
මේක මම හදපු ත්රෙඩ් එකක්.කොහෙන්වත් කොපි කරේ නැ. ඒත් පොටෝ නම් උස්සපු එවා.
ඔන්න මම් වැඩේ කරන හැටි කියලා දුන්න. ඉතිරි වැඩ ටික ඔයලා අතේ තමයි ඉතින්.අනිත් අයටත් බල්ලන්න බම්ප් එකක්වත් දාලා යන්න.
ජය වේවා....
Last edited: